
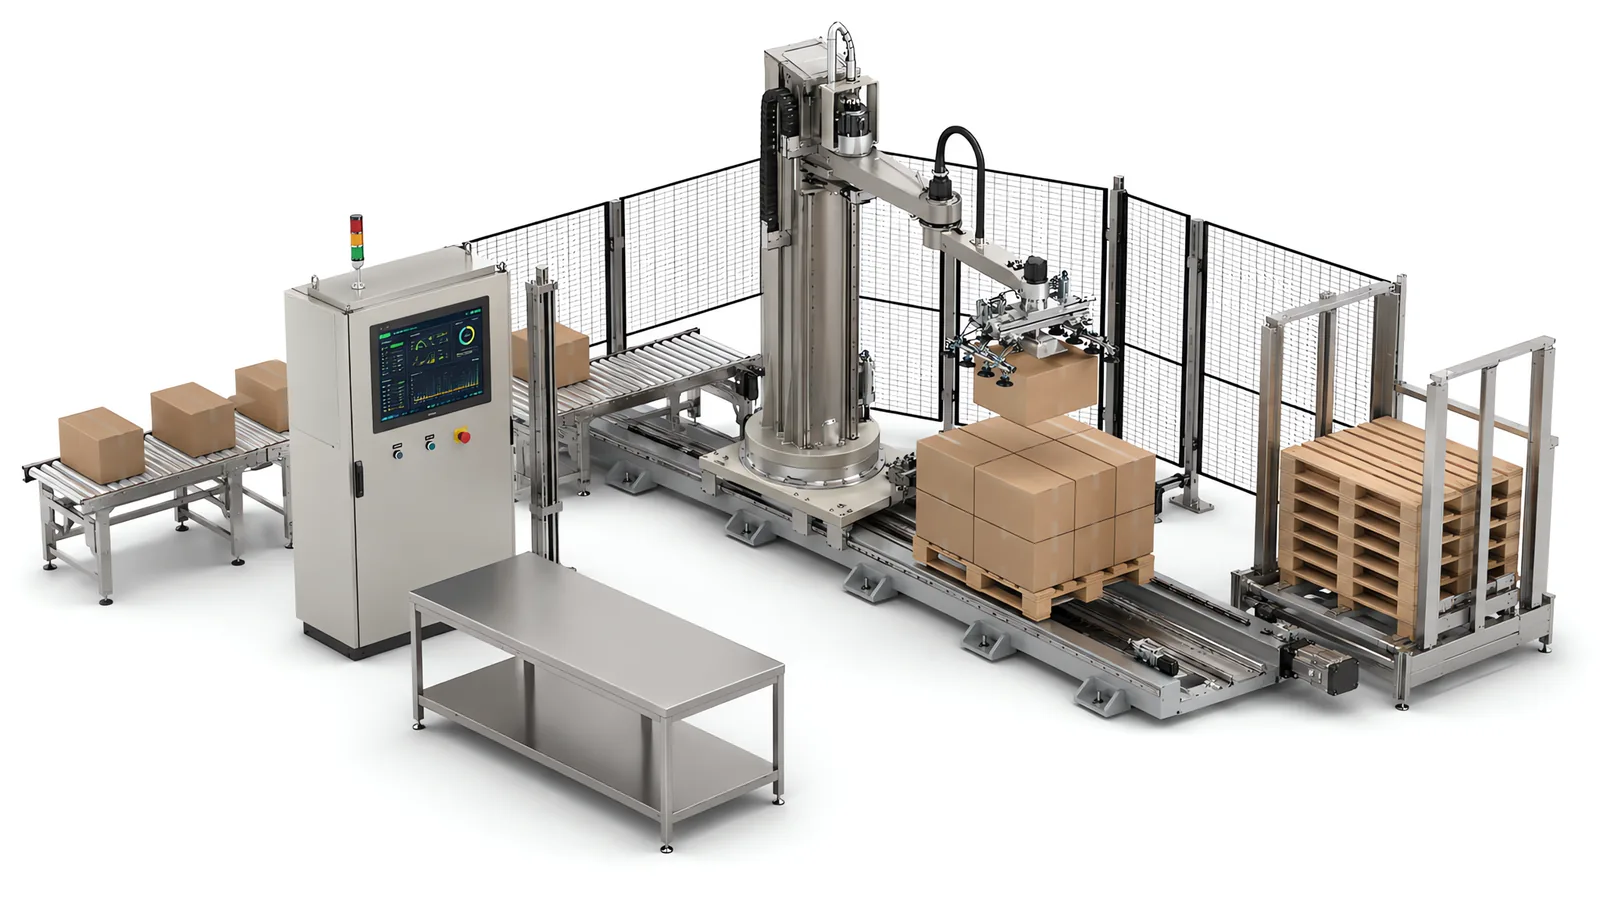
Industrial robot cost includes the arm and controller, tooling, part presentation, guarding, controls integration, programming and acceptance testing. To budget a working cell, price each of those against the same part, rate and operating task. A low-cost arm can be a useful saving when it meets the application and does not add cost elsewhere.
Motionwell integrates industrial robots and collaborative arms into production cells in Singapore. We use catalogue grippers where they suit the product and design application tooling where the part needs it. This guide shows which specification decisions change the cost of that complete cell.
The short answer. An industrial robot price or a cobot price buys a manipulator, a controller and a way to teach it. A cell price buys everything that turns that arm into a station: a tool that holds every part, a way of getting each part to the pick point in a known pose, safety functions rated and validated against the hazards of the application, a controller and a signal list tying the cell to your line, programs for every variant and every stop state, and a test that proves rate on your parts before the invoice is settled. Each of those is sized by decisions in your specification, not by the badge on the arm, which is why the same nominal cell comes back at different levels from different suppliers, and why a cheaper arm can sit inside a dearer cell. What follows is where each item comes from and what in the specification moves it.
How Do You Build an Initial Robot Cell Budget?
Use separate allowances for the robot package, tooling and feeding, safety and controls, engineering and testing, then site work. Ask for a budget range against your concept and convert those allowances into quoted items as the design is defined.
| Budget line | What to request for the estimate |
|---|---|
| Robot package | Model, controller, safety and network options, mounting and dress pack |
| Tooling and feeding | Part samples, presentation method, variant families and grip confirmation |
| Cell controls and safeguarding | I/O, line interfaces, access tasks and safety functions |
| Engineering and acceptance | Design, programming, variant tests, FAT, SAT and documentation |
| Site and operating costs | Installation, utilities, training, licences, support and initial spares |
Total these lines, add an allowance for the identified unresolved design items, and record the assumptions beside the estimate. Keep one-off capital separate from annual support and operating costs so the same worksheet can feed the payback calculation.
The arithmetic that turns cost lines into a payback, and the lines a quotation leaves off the capital side, are on our automation ROI calculation page. What an integrator delivers beyond the arm, and how a brand gets chosen, is on the robot integration services page. Whether a force limit or a fence is the better buy for your rate is argued on our cobot vs industrial robot page. This page follows the money item by item instead.
What Does the Price of an Industrial Robot Actually Include?
It includes less than the word robot suggests. A robot purchase typically covers the manipulator, its controller cabinet, a teach pendant, the base software and the cables between arm and controller. That is a machine that can move its flange to a taught point, and nothing more.
What sits outside the price is the part that matters to a cell. Some of it is listed by robot vendors as options or accessories, and the rest is not on their price list at all because it is engineering.
| Item | Where it typically sits | What in your specification decides it |
|---|---|---|
| Manipulator, controller, pendant, base software | Inside the robot price | Payload at the real centre of gravity, reach across the real layout, repeatability against the placement the process needs |
| Safety-rated software functions: monitored speed, standstill, axis limiting | Included or optional depending on robot model and controller package | Whether a person shares the space, and for what tasks |
| Fieldbus interface and additional I/O | Options or accessories | Which network your plant standard runs, and how many signals cross the boundary |
| Cables and utilities from the controller to the tool | Accessories, or a dress pack designed around the tool | What the gripper needs: air, vacuum, power, a camera trigger, a network drop |
| Mounting: pedestal, base plate, overhead frame, or a track | Catalogue accessory or application-specific structure | Floor area, reach across the layout, and whether one arm serves several stations |
| Tool changer, force sensor, vision licence, offline programming software | Accessories with their own part numbers | Variant count, process type, and how paths will be produced and maintained |
| Everything in the sections below | Engineering work | The part, the process, the line and the people around it |
Two things follow from that table. Compare the actual safety functions and controller options included in each package. Collaborative arms commonly include functions for shared-space applications, but guarding still follows the complete application assessment. And the arm’s own price is decided by figures you can read from a drawing: payload with the tool on the flange, reach to the furthest place, and the repeatability the process can actually use. Those are settled early, from the drawing. The items in the rest of this page are the ones your own specification sizes.
Why Does the Gripper Cost Depend on Your Part, Not on the Robot?
Because the robot ends at a flange with a bolt pattern, and everything from that flange to the part is designed against the part. A gripper is either a part number or a drawing, and the line between the two is drawn by your product.
A catalogue gripper covers the job when the part offers a face a vacuum cup can seal against or parallel faces a pair of fingers can close on, when one geometry runs on the cell, and when the required grip confirmation can be provided by the selected gripper and sensors. On those jobs the tool is a catalogue unit plus a mounting plate and a bracket, so the cost is a component price and a day of design, with no tooling programme behind it. It is worth asking any supplier which catalogue family the gripper comes from and whether a replacement can still be ordered against a part number in three years, because a gripper delivered as an unlabelled assembly is a drawing you have to recreate the first time one is dropped.
The cost crosses into design work when any of those conditions fails. A porous or perforated surface needs a gripping trial. High-flow vacuum with suitable sealing foam may work; mechanical or needle gripping offers other options where vacuum cannot hold the part reliably. A second geometry on the same cell means a compromise tool, an adjustment axis with a motor and a homing routine, or a second tool and a changer. A part that must be confirmed as held adds a vacuum sensor, a finger position sensor or a part-present check, each a device and a signal. And a collaborative application constrains the tool’s shape, because the edges and protrusions on the gripper are what a contact assessment measures, so a tool that would be a bracket on a fenced cell becomes an engineered shape on an open one.
Three questions settle which side of that line your tooling lands on, and they can be answered from a drawing and a sample. Does the part offer a sealable or clampable face? How many distinct geometries share the cell? What has to be proved about the grip before the arm moves? Payload budgeting, the gripper families and the verification options behind each answer are on our end of arm tooling and gripper design page.
What Does It Cost to Get the Part to the Pick Point?
Every robot program assumes the part is where the program expects it, in the pose the gripper was designed for. The arm’s price contains nothing that makes that true. Getting the part there is a separate item, and it is sized by how the part arrives at the station today. The nest-fed case sits in the cost driver table on our robot integration services page, so the table below starts one step down from it.
| How the part arrives | What the cell has to add | The lever in your specification |
|---|---|---|
| In a tray or magazine, one part per pocket | A tray station, a tray change method, and a pick grid in the program | Ask your supplier to ship in trays, or design the tray once and use it upstream too |
| On a conveyor, oriented but not located | A stop, a squaring device or a sensor that triggers the pick, and often a camera for the residual offset | Specify the conveyor’s stop position and its repeatability as a requirement |
| On a conveyor in random orientation | Vision to find the pose, and a gripper that can approach from every pose the camera reports | Reduce the number of stable orientations the part can settle in |
| Loose in a bin or tote | A feeder that presents one part at a time in one orientation, or flexible feeding with vision, plus a buffer sized to the feed rate | Change the packaging one step upstream; a bin is a decision somebody made |
| Bulk small parts | A bowl or linear feeder with tooling cut for this part and no other, running with margin above the robot’s rate | Freeze the part’s geometry before feeder tooling is cut |
Two mechanisms drive the money in that table. Feeder tooling is specific to one part: the tracks, wipers and escapements that orient it are shaped against its features, so a second part is a second set and a part revision after the tooling is cut is a rebuild. And the feeder has to run ahead of the robot with margin, because a robot that waits on its feeder runs at the feeder’s rate whatever the arm cost. Both are covered in depth on the part feeding and presentation page. The point for a cost discussion is that the lever sits upstream of the cell: a part that arrives in a tray from the supplier has already been fed, and the cell inherits that presentation without paying for it.
Which Safety Items Are Paid For Whether the Arm Is Collaborative or Not?
More of them are paid for than a cobot price suggests. Safety scope on a robot cell is driven by the application, and the standard that governs the application makes the point directly. ISO 10218-2:2025 covers the robot application and the robot cell, and this edition incorporated most of the requirements that ISO/TS 15066:2016 held for collaborative operation, so the application requirements, including power and force limiting and contact evaluation, are addressed in the revised cell standard. Buying a collaborative arm moves you to a different clause of the same document, and the items below arrive with the document.
A task-based risk assessment, written against what people will actually do at the cell: loading, clearing a jam, changing a gripper, cleaning. It is the document every later safety decision cites, and how one is built is set out in our guide to machine safety risk assessment.
Safety functions, each with a required performance level and each validated on the built cell. An emergency stop, a protective stop on any access, and a defined restart. On a collaborative arm the arm’s own monitored speed and force functions join that list, and each still has to be shown to work with the real tool and the real part on the flange, using the manufacturer’s declared limits and the actual tool, load and settings.
Validation records that survive an audit: what was measured, with what instrument, on what date, by whom.
Recovery and restart logic, because a cell that stops safely and then cannot be restarted without a technician stops safely a great deal.
What changes with the strategy is not whether those exist but what they contain, and the risk assessment’s own questions show where the money separates.
| Question the risk assessment asks | If the answer leads to a fence | If the answer leads to collaborative operation |
|---|---|---|
| How often does a person enter, and to do what? | Interlocked access, locking where the hazard outlasts the stop, and a restart procedure | A contact assessment for every task where a person and the arm can meet |
| Where does the hazard sit? | In the arm’s motion, so the guard is positioned from measured stopping performance | If it sits in the part or the tool, collaboration does not remove it and guarding returns |
| How is the protective behaviour proved? | Stopping performance and access/restart functions verified on the built cell | Verify stopping and separation functions; measure force and pressure where contact is permitted |
What that table does not say is which column costs less, because that depends on your task list. The lever is a truthful account of the first row of your own process: how often somebody enters and what for. A cell entered a few times a shift to reload and never otherwise has a different safety bill from one where an operator works beside the arm all shift, and the arm brand does not change that. Two further rows of that comparison, tool geometry under a contact assessment and what full speed behind a closed door is worth against shared space, are on our cobot vs industrial robot page. The standards side of the collaborative case is on our guides to ISO 10218 for robot cells and ISO/TS 15066 and where its content went, and what makes an arm collaborative in the first place is on our explainer on collaborative robots.
Where Does Integration Cost Hide Between the Cell and Your Line?
It hides at the boundary, and on both sides of it. A standalone cell and a line-integrated cell have different interface scopes. Assign the conveyors, signals, utilities and recovery logic explicitly so the installed cell works with the surrounding process.
| Boundary | What typically has to exist | The question that settles the scope |
|---|---|---|
| Cell controller and panel | A PLC that owns the sequence, the handshakes and the recovery, in a panel designed and built for the cell on your plant’s platform | Which platform your maintenance team can open and stock spares for |
| Signal list to the line | Part ready, cell ready, buffer full, fault, reject, in a physical form your line can accept | Who owns each signal, written down before either side is built |
| Upstream and downstream conveyors | Stops, squaring, sensors, and drives that can stop at a position | Whether the existing conveyor was ever designed to stop where a robot needs it to |
| Vision and data | Cameras, lighting, the records they produce, and where those records go | Whether the cell reports to a panel, a supervisory system or a plant database |
| Utilities and site | Power, compressed air, floor loading, anchoring, guarding footprint, forklift access | A site survey before the layout is frozen |
| Existing machines the cell serves | A way to command a machine that was never designed to be commanded | Whether the machine offers I/O or a network interface, or only a front panel |
Three of those rows carry engineering that a robot quotation does not show. The conveyor row: a carton pick position can use a controlled conveyor stop, mechanical locator, servo indexing or vision correction according to the required tolerance, which is why the choice between a soft starter and a VFD on an existing conveyor turns into a robot question the moment a robot is added at its end. The data row: what the cell reports and to whom is a design decision with cost attached, and the split between local screens and plant-level supervision is set out in our comparison of SCADA and HMI on a machine. The last row: a machine that offers only a front panel to the outside world has to be given an interface, and that work is priced per machine.
Where the cell is one station in a longer line, the integration scope grows from a boundary into a line, and that version is on our packaging line integration page. The panel itself, its design rules and its testing, is on the control panel design and build page.
Why Is Robot Programming Priced by Variants and Stop States, and Not by Motion?
Because teaching the path is the short part of the job. A pick-and-place move between two taught points is an afternoon on a pendant. The program that runs a production station is a different object, and its size is set by multipliers that a specification can state and a quotation should show.
The first multiplier is variants. Every product that differs in geometry needs its own pick offsets, place positions and often its own vision job, and every product that differs only in settings needs a recipe holding those settings with a version and an owner. The count that matters is distinct hardware sets, and how that count is kept down is the subject of our guide to reducing changeover time on automated machines.
The second is stop states. A cell stops for a missing part, a dropped part, a vision reject, an opened door, a full downstream buffer, an empty feeder, and a fault on any device. For each, the program has to know what the arm is holding, where it is, what is safe to do next and how the operator is told. Recovery logic that is written is a list of cases. Recovery logic that is not written is a technician on the floor at every stop. This is the part of programming that separates a station that runs unattended from one that does not, and it is invisible in a demonstration.
The third is stations and devices. Every camera, feeder, screwdriver, printer or test instrument in the cell has an interface, a fault list and a place in the sequence, and each one adds its own cases to the sequence and to the fault handling.
| Programming scope item | What sets its size |
|---|---|
| Robot paths and pick and place positions | Number of distinct geometries, and whether points are taught to a datum or to the part |
| Recipes | Number of variants that differ only in settings, and who is allowed to select or edit one |
| Vision jobs | Guidance and inspection tasks, the variants each job can cover, and the required lighting and calibration |
| Sequence and handshakes | Stations and devices in the cell, and the signals to the line |
| Fault handling and recovery | Stop states multiplied by what the arm may be holding at each |
| Operator interface | Screens, permissions, alarm text that names the device and the next action, and the records the cell keeps |
| Documentation of the code | Whether a contractor who has never seen the cell could open it and change a variant |
The lever is the variant count and the stop list, and both are yours to write. A specification that says the cell handles all current and future products has asked for a program that cannot be sized. One that lists the geometries, the settings-only variants and the stop conditions the operator is expected to recover from has asked for one that can. That list belongs in the user requirement specification, and how to write one is on our automation URS page.
What Does Acceptance Add, and Why Does Skipping It Cost More?
Acceptance is the item that converts a built cell into a paid-for one, and it is easy to trim because it produces no hardware.
Factory acceptance at the builder’s facility proves the cell against the agreed rate, accuracy and repeatability on your parts, with your people watching, while the builder has access to the machine and test equipment. Site acceptance repeats that on real production material with the line running. Around those two tests sit the items that carry money and get argued about when they turn out to be missing from the scope.
| Acceptance item | What it proves | What its absence costs you |
|---|---|---|
| Factory acceptance test on your parts | Rate, placement and grip on the real product, before shipping | Discovering at site that the datasheet cycle and the real cycle differ |
| Site acceptance on production material | Behaviour with the real line, real light and real operators | A cell that passed in a workshop and drops parts on your floor |
| Documentation pack | Schematics, program backups, parameter lists, spares list, safety file | Lock-in to the builder for every change, and a maintenance team working blind |
The items on the first row’s test day are set out in our factory acceptance test checklist. Safety function testing, training, spares holding and validation belong on the same handover and carry money with them, and they are itemised as cost lines on our automation ROI calculation page. The point for this page is narrow: acceptance and documentation are priced work, they sit inside a serious quotation, and a quotation that is cheaper because they are absent is not cheaper.
When Does a Low-Cost Robot Arm Produce an Expensive Cell?
The phrase low cost industrial robot describes the arm and nothing else, and there are specific conditions under which saving on the arm costs more than it saves. None of them is about brand quality. All of them are about what the arm does not bring with it.
The platform is new to your maintenance team. Spares, training, the programming environment and service cover for a platform your plant does not run are costs of ownership no purchase order shows, which is why the brand decision on the robot integration page starts from what your plant already runs. We carry more than one platform ourselves for that reason: the arm is chosen per application and per plant standard, and the cost of getting that choice wrong lands on whoever holds the spares and has to open the program in year five.
The controller lacks the safety-rated functions the application needs. Safety-rated monitored speed, standstill and axis limiting on the controller change how much external guarding a cell needs and where its access points can be. Where those functions are unavailable, design alternative safeguarding and stop functions around the documented robot behaviour and hazards.
There is no interface for your network. A gateway, a translation layer and the engineering to make them reliable cost more than the fieldbus option would have, and they add a device that has to be maintained.
Documentation and support are thin. A program you cannot back up, restore or read is a cell you cannot maintain, and that cost is paid every time it stops.
The arm only just fits. A payload or reach chosen without headroom is an arm replaced at detail design when the tool is weighed, or an arm that cannot reach the top of a stack and needs a lift column nobody budgeted for.
None of this argues for the dearest arm. It argues for reading what an arm’s price leaves out before treating the difference between two arms as a saving. Where a lower-cost platform brings the safety functions, the interface and the support the application needs, it is the right buy.
What Can You Change in the Specification to Bring the Cost Down?
A good deal can move, and none of it requires changing the arm. Each section above closed with the lever that belongs to it: the variant list, how the part arrives, who enters the cell and why, the plant platform, the stop list. Four more sit across all the sections and belong to none of them, which is why they get missed.
- Set accuracy from the product’s tolerance, and never from a datasheet figure. A placement tolerance tighter than the product can use buys vision correction and fixturing the product cannot benefit from, and it narrows the choice of arm for no gain in the finished assembly.
- Decide what the cell reports before it is built. Adding a data interface after commissioning reopens the program and the panel, and it reopens the question of who owns the records.
- Scope documentation to the regulation that applies. Keep the safety, test and maintenance records needed for every cell; add product-quality qualification and validation deliverables where the process requires them.
- Write the exclusions yourself. A specification that names what the cell will not do, which products it will not handle and which stops the operator will not be asked to recover from, gets priced against a boundary, and one without them gets priced against the widest reading of every sentence in it.
One lever sits outside the cell altogether. If the robot is meant to lift the output of a line you already own, check where the losses on that line actually are before a station is specified, because a robot at a station that was never the constraint automates the wrong problem. What those losses look like on existing equipment is the subject of our guide to improving production efficiency.
What Is the Better First Question?
Build the industrial robot cost estimate around the process: the part sets the tool, its incoming presentation sets the feeding, and the operating task sets the controls and safeguarding. Compare separate scope lines, then test cost-saving options against the rate and quality requirement. This makes a cheaper arm, simpler tray or reduced variant range a measurable design choice.