
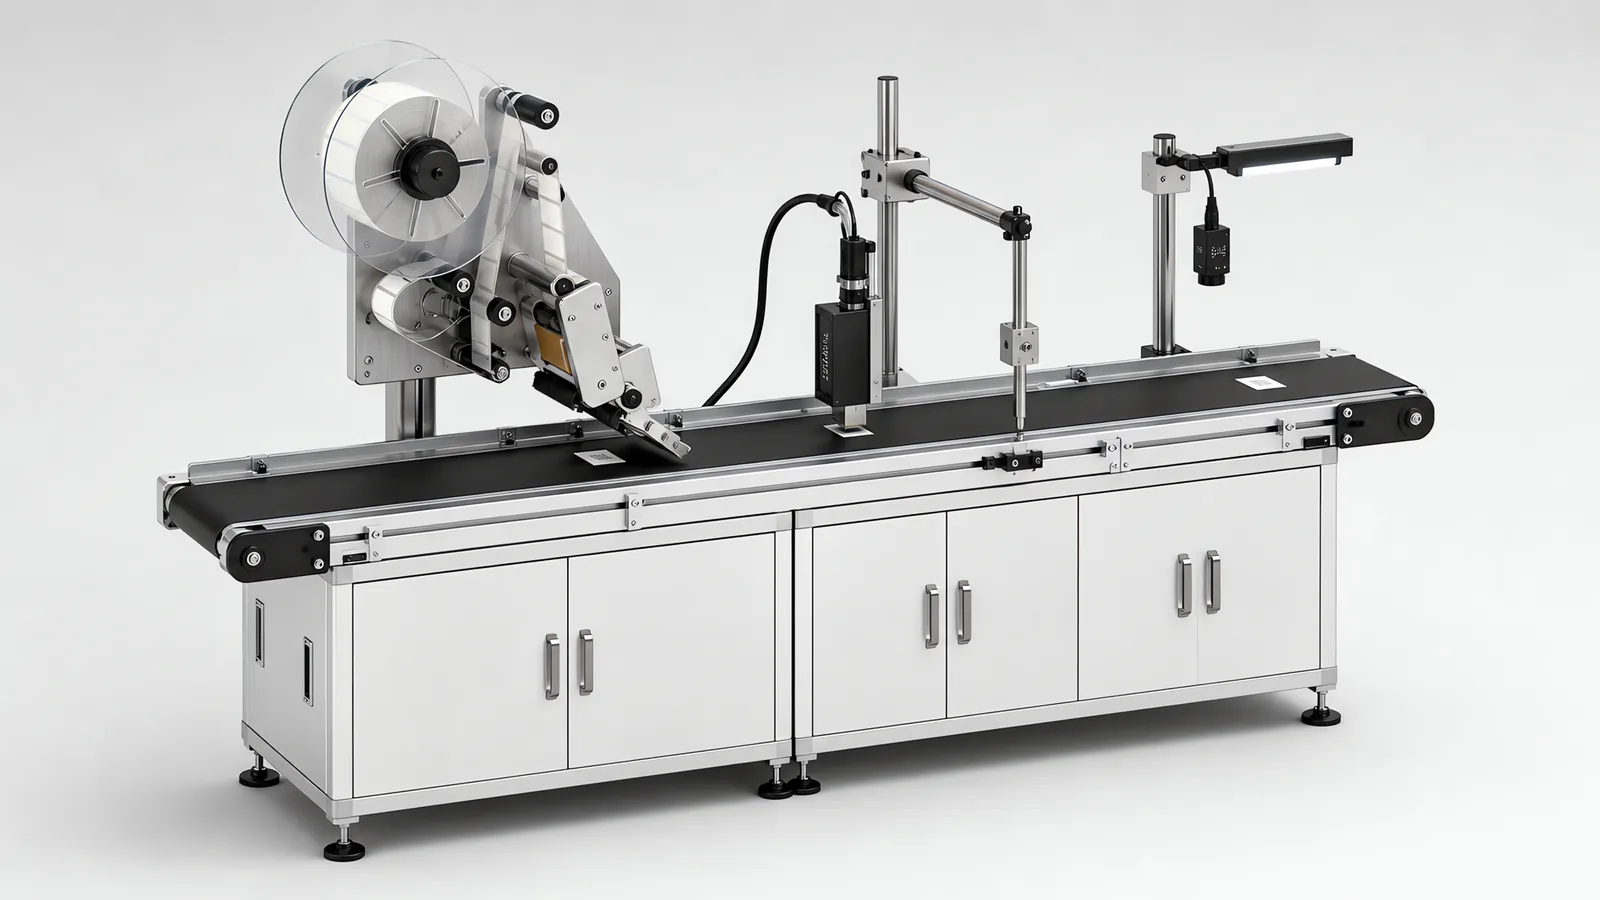
Motionwell Automation integrates labelling machines and coding systems into production lines in Singapore. We design the container handling, applicator mounting, print trigger, verification and reject sequence around your pack and line rate. Delivered work includes a date and batch coder on a modified conveyor and vision-guided labelling with inline print-quality grading to ISO/IEC 15416. Design, assembly and testing take place at Woodlands Link.
High-speed rotary roll-fed labellers and shrink sleeve applicators with their own steam tunnels are mature standard machines, bought from the specialists who build nothing else and integrated into the line around them. What we design is the labelling and coding station that has to fit your container, your line rate and your verification requirement, together with the control and reject logic underneath it.
The serialised end of this work, where every pack carries a unique identity, is set out on our pharmaceutical serialization and track and trace page.
Which Labelling Method Should You Actually Use?
Labelling machines are grouped by how the label is carried to the container and stuck to it. That choice is made early, because it decides the container handling, the changeover time and the consumable cost for the life of the machine.
| Method | How the label gets on | Suits | Where it struggles |
|---|---|---|---|
| Self-adhesive wipe-on | Label peels from its liner at a peel plate and is wiped on by roller, brush or spinning belt as the container moves past | Most formats, high SKU counts, short runs, top, side and wrap positions | Liner waste, adhesive performance on cold, wet, oily or low-energy plastic surfaces |
| Tamp or blow applicator | Label transfers to a vacuum pad, then a pneumatic stroke tamps it on or an air blast blows it across a gap | Cartons, cases, recessed panels, stationary product, variable data | Slower per cycle than wipe-on, and pad geometry plus stroke length are format-specific |
| Print and apply | Variable data is printed on the label immediately before it is applied by tamp or wipe | Case labels, pallet labels, anything where the data changes pack to pack | Printer plus applicator means more consumables and more moving parts than a coder |
| Roll-fed wrap-around | Label is cut from a reel and wrapped around a cylindrical container with hot melt or cold glue | High-volume cylindrical containers running one format for long periods, lowest material cost per label | Long changeover, a glue system to maintain, and unforgiving of container diameter variation |
| Shrink sleeve | Printed sleeve is cut, opened, dropped over the container and shrunk in a steam or radiant tunnel | Full 360 degree coverage, complex or tapered shapes, tamper evidence, neck banding | Needs a tunnel and its utilities, sleeve cost is higher, artwork has to be distorted to match the shrink profile |
| Stretch sleeve | Elastic sleeve is stretched open and released around the container | No glue, no heat, easy separation for recycling | Straight-sided containers only, no taper |
| Thermal transfer overprint | No label at all. A heated printhead prints directly onto the packaging film through a ribbon | Flow wrap, sachets, pouches, where date coding is the whole requirement | Ribbon consumable, and the film needs a platen behind it and controlled tension |
A roll-fed labeller wins on consumable cost per container and loses on flexibility. If your plant runs one bottle format at volume every week of the year, that trade is usually worth taking. If your SKU count is climbing and promotional packs come and go, self-adhesive is the safer machine even though the labels cost more, because the changeover cost you avoid is paid every week and the material saving is paid once per label.
How Does Container Shape Decide the Labelling Method?
Shape decides how the container can be held, and holding decides everything else.
Cylindrical containers can be rotated. A drive roller or a backing belt spins the bottle under the peel plate so label and container travel at matched speed, and a full wrap or a front-and-back pair lands cleanly. This is the easiest case, and it is why roll-fed labelling exists at all.
Tapered and conical containers cannot be spun on a straight axis without the label lifting at one edge. The label has to be die cut as an arc, and the applicator and container axis both get tilted so the contact line stays perpendicular to the taper. Get either wrong and you produce a wrinkled label that passes at the machine and fails on the shelf.
Flat, oval and rectangular packs must be held and indexed. The container is carried on a puck, a chain flight or a clamped conveyor, and separate applicators handle front, back and wrap-around positions. Oval containers add a registration problem: the label has to start at a defined point on the perimeter, which means the container orientation has to be known before it reaches the applicator.
Small vials and ampoules are a handling problem first. They tip, they roll, and they arrive from the filler at whatever orientation the outfeed left them in. Pucks or a starwheel that holds the vial square under the applicator matters more than the applicator specification, and that handling design is the same discipline used on our GMP filling and sealing machines, where retroreflective sensors confirm container presence at every fill position.
Two surface properties override all of the above. Surface energy decides whether the adhesive holds at all: untreated polyethylene and polypropylene need a suitable adhesive, and sometimes corona or flame treatment, before any applicator will help. Temperature and moisture decide the rest. A chilled container coming out of a cold room carries condensation, and no general-purpose adhesive bonds to a wet wall.
An upright bottle may still face the wrong way for its label panel. bottle orientation before labelling distinguishes upright supply from feature orientation at the receiving machine.
What Label Placement Accuracy Is Realistic, and What Limits It?
The applicator is almost never the constraint. On a servo station the machine side is capable well beyond what a label needs; the vision-guided SCARA panel assembly cell we delivered repeats to plus or minus 0.01 mm. Label placement lands orders of magnitude looser than that, because the loose part is the container.
Placement error accumulates from five sources, and they add up in the order they occur:
- Container position and skew as it arrives at the applicator. A bottle sliding on a flat-top chain is not located; a bottle in a puck is.
- Container dimensional tolerance. Blow-moulded bottle diameters vary within their own tolerance band, and a wrap label sees that variation directly as an overlap or a gap.
- Label pitch and web registration. Labels are die cut on a web with their own pitch tolerance, and the peel point has to be found from a registration mark or a gap sensor.
- Web tension and speed matching. Label dispense speed has to match container surface speed, and any mismatch stretches or drags the label.
- Line speed changes. A timer-driven dispense walks its placement every time an operator changes the infeed rate. An encoder-driven one does not.
The fixes are mechanical before they are electronic: hold the container positively, feed the web from a line encoder, and where the container has a feature that matters, register from it. That last point is where vision earns its place. A camera finds the seam, the cap orientation, an existing printed panel or a moulded mark, and the controller offsets the applicator or the container rotation to suit. That is what our vision-guided labelling stations do, and the camera, lens and lighting choices behind it are covered on our machine vision inspection page.
Which Coding Technology Fits: CIJ, TIJ, Laser or Thermal Transfer?
Coding and marking in Singapore carries one extra constraint that catalogue advice skips: HSA and the destination market decide the data set before the printer technology does, so the sequence is always regulation first, print area second, printer third.
Coding and marking is a separate decision from labelling, and it is made against the substrate.
| Technology | How it marks | Suits | Limits |
|---|---|---|---|
| Continuous inkjet (CIJ) | A stream of charged droplets is deflected onto the pack, non-contact, tolerant of distance and curvature | Cans, bottles, cables, pipes, wet or dusty environments, fast lines, curved surfaces | Solvent and make-up consumption, regular cleaning and servicing, lower resolution so a 2D code needs a large module size |
| Thermal inkjet (TIJ) | Cartridge-based drop-on-demand. Ink is heated to fire a droplet, high resolution, no service kit | Cartons, labels, coated and porous substrates | Short throw distance, so the printhead must sit close to a reasonably flat surface. Cost sits in the cartridge |
| Laser (fibre, CO2 or UV) | Removes, foams or changes the colour of the substrate itself. Permanent, no consumable | Glass, metal, coated cartons, anywhere permanence and tamper evidence matter, and high annual volumes | Contrast depends entirely on the substrate, needs fume extraction and a fully enclosed interlocked beam path, highest capital cost |
| Thermal transfer overprint (TTO) | A heated printhead transfers pigment from a ribbon onto packaging film, intermittent or continuous | Flexible film on flow wrappers and sachet machines. The usual answer for date coding on film | Ribbon consumable, and the film must be supported against a platen with controlled tension |
The deciding questions are the same five every time. What is the substrate, and what contrast can you get on it. How large is the available print field, once the human-readable fields are included. Does the mark have to survive handling, moisture, abrasion or a wash cycle. What is the line speed at the print position. And what does the environment allow: a solvent-based CIJ in a cleanroom, or a laser near a solvent vapour zone, are both conversations with your EHS team before they are equipment decisions.
One point worth stating plainly, because it costs projects money. Choosing a coder for its rated speed and ignoring the substrate is an error that shows up only once production starts. A code is only useful if it can be read afterwards, and a printer running at rated speed onto a substrate it cannot mark cleanly is producing rejects at rated speed.
The laser marking machine guide develops the material trial, enclosure and data-verification sequence. After label application, a label inspection system should distinguish a readable symbol from the correct artwork, position and variable content.
Why Does a Code Have to Be Read Back After It Is Printed?
A printer only knows what it was told to print. It has no way of knowing what landed.
Every one of these failures produces a pack the printer counts as good: a blocked nozzle dropping part of a character, a cartridge that ran out mid-batch, a code printed across a carton fold, a smear from a container that was still wet, a substrate change from a new supplier that the print settings were never tuned for, and the worst of them, a correctly printed code carrying the wrong recipe because a changeover step was skipped.
Printing without verification is a process with no feedback in it. Adding a reader closes the loop, and it does three separate jobs:
- Decode: confirm a readable code exists on this pack. Anything that does not decode is rejected at the station that found it.
- Grade: report how much margin was left. 2D symbol quality is graded to ISO/IEC 15415 and linear barcodes to ISO/IEC 15416, and a grade is only meaningful with its measurement conditions stated. Specify readers that report the grade, and trend it, because printheads degrade and a grade drifting from B toward C over a shift is a maintenance ticket you can raise before making a single reject.
- Compare: confirm the printed string matches what the line was told to print. This is optical character verification, and it is the check that catches yesterday’s expiry date printed on today’s batch.
Two design points follow from this. First, print and verify are two stations. Thermal inkjet needs travel distance for the ink to set before a camera looks at it, and a reader mounted immediately after the printhead produces grade drift that has nothing to do with print quality. Second, the reject has to be confirmed. A sensor after the reject device verifies the pack actually left the line, and no confirmation means the line stops, because a reject that quietly failed to fire is worse than no reject at all.
Where every pack carries a unique serial, the reject logic gains a reconciliation requirement on top: commissioned serials must equal good packs plus rejects plus samples, with no gap. That is the subject of the serialization page.
What Is the Difference Between a Batch Code, a Date Code and a 2D Code?
They are different fields with different sources, different regulatory drivers and very different costs to the line. Buyers often ask for all of them and then discover the print area holds two.
| Field | What it is | Why it is there | What it costs the line |
|---|---|---|---|
| Batch or lot code | Identifies the production run | The basis of any recall, and required across food, pharmaceutical and medical device production | Small print field, set from the batch recipe, low technical risk |
| Date code | Manufacture date, best before, use by or expiry, in a market-specific format | Food and pharmaceutical regulation, and the acceptable format differs by destination market | Must derive from the line clock and the batch record. Never typed by an operator |
| 1D barcode | Trade item identity for scanning at retail and distribution | Retail trading partner requirements and GS1 practice | Print quality has to be graded to ISO/IEC 15416, or it fails at someone else’s scanner |
| DataMatrix with shared product or batch data | Product, batch or other specified fields in a compact symbol | Customer and application data requirements | Verify the encoded content and symbol quality; repeated batch identities can be valid |
| Serialized DataMatrix | Product code, unique serial number, batch and expiry | Serialization regimes such as US DSCSA and EU FMD, plus customer standards | Requires a serial number source, per-pack uniqueness, verification, reject and reconciliation |
| Human-readable text | The coded fields printed as readable characters alongside the symbol | DSCSA requires a human-readable version of the coded fields; confirm the equivalent requirement for each destination market | Consumes print area, and print area is what runs out first |
Date coding deserves separate attention, because it generates more non-conformances than any other field on the line. The reason is always the same: it is the field most often set by hand. The rule we build to is that date fields are calculated. Shelf life comes from the product recipe, the date comes from a synchronised line clock, the operator selects a recipe, and the printed result is read back and compared to what the line was told to print. An operator who can type an expiry date will eventually type the wrong one, usually at the start of a night shift.
On regulatory scope: Singapore has no national serialization mandate on the DSCSA or FMD model, so a plant here usually meets the 2D code requirement through the export market and from the customer’s own global standard. Batch and date coding requirements, by contrast, apply locally and always. Confirm the current text per destination before the print field layout is fixed, because the data set decides the field count, the field count decides the module size, and the module size decides the camera and lens.
Where Do the Labeller and the Coder Actually Go on the Line?
The rule is to code as late as possible, but never onto a surface that a later station covers up.
A layout mistake worth checking for is a code printed on a panel that later disappears under a shrink band, a tamper seal, a carton flap or a case label. Before anyone orders equipment, walk a sample pack through every downstream station with the intended code position marked in pen. It costs an afternoon and it has saved several projects a station relocation.
A typical order of travel on a filled-container line runs: fill, close and cap, verify fill level and closure, dry or blow off the container wall, apply the label, code onto the label or the container, verify the code, reject, then collate into cases and palletize. Two placement decisions inside that sequence are worth arguing about.
Code onto the label, or onto the container? Coding onto the label before it is applied, in a print-and-apply station, means a bad code costs you a label. Coding onto a filled container means a bad code costs you the product inside it. Where the data changes pack to pack and the reject cost is high, printing and verifying before the label is committed is usually the cheaper architecture.
How much conveyor between the camera and the reject? More than most layouts allow for. The controller tracks each pack in a shift register from the read position to the pusher, and short-changing that distance is a common cause of the wrong pack being ejected. The reject device itself is inexpensive pneumatics; the tracking behind it is where the engineering sits.
Above the container level, the case label carries its own barcode and is verified before it goes on, and the pallet label is built from confirmed cases only. Where the plant needs unit-to-case-to-pallet parent-child links, that is aggregation, and it has to be designed into the case packer.
What Happens at Changeover, and How Long Should It Take?
Changeover is where a labelling and coding station either earns its keep or quietly destroys your available production time. A machine that runs beautifully and takes forty minutes to change over is the wrong machine for a plant running six SKUs a day.
Split the changeover into three parts and cost each one separately.
Recipe changes should be a selection on the HMI. Label artwork, code content, date offset, camera inspection recipe and reject rules all belong in one recipe selected together, so it becomes impossible to load new artwork while leaving the old expiry rule in place. Where an MES or a barcode scan can select the recipe, better still: the operator no longer chooses.
Mechanical change parts are the real constraint. Guide rails, pucks, starwheels, applicator brackets and printhead mounts should adjust against scales with positive locking, ideally without tools. On our delivered filling platform the equivalent change is a machined tray set lifted out by hand, and that platform runs a continuous dual-tray feed specifically so a tray change does not stop the line at all. Roll-fed labelling is the hardest case here, because the glue system, the cutting drum and the container handling all change together.
Consumables and clearance. Label reel changes want a splice detector and a low-label warning that gives the operator time, not an alarm after the last label. Ribbon and cartridge changes want the same. And on any line running serialised or batch-coded product, line clearance is a machine design question: open guarding, no dead pockets under transfer plates, removable guide rails and a clear view into every accumulation point are the difference between a fifteen-minute clearance and an hour, four times a day, forever.
What Has Motionwell Delivered on Labelling and Coding?
Four builds cover the delivered scope.
- Coder integration on a conveyor modification: a date and batch coder added as a station inside a delivered conveyor modification, which is the scope this page describes. The engineering in that job is not the printer, which arrives working. It is the pack, held square and at a repeatable distance from the printhead as it passes, triggered off line position so the code lands in the same place when the line slows down, with travel left between the print position and the read position so the mark is dry before a camera grades it.
- Vision-guided labelling on electronics lines: on-demand label printing with real-time position compensation from the camera, plus print quality and barcode readability graded to ISO/IEC 15416 while the line runs, with reject gates that segregate at the station that found the fault.
- Label and code verification as an inspection task: presence, position and skew, correct artwork variant against the batch recipe, OCR and OCV on lot and expiry, and code grading, on the platforms described on our machine vision inspection page.
- Code capture before case entry: the secondary packaging line currently in delivery reads every unit code as the pack enters the case lane, using four SCARA robots on a deterministic pick sequence.
Printers, cameras, applicators and label stock are integrated, and which printer, camera and control platform goes onto the station is settled by what your plant already stocks and can get serviced locally, because a coder whose consumables take a week to arrive stops your line as effectively as a broken one. Where the pack carries a serialised identity, the serialization platform stays with whoever sold it to you and what we build is the line that feeds it.
What Drives the Cost and Lead Time of a Labelling and Coding Station?
Labelling and coding station cost depends on the container presentation, application method, print content and verification scope. Compare those items alongside the line interface and changeover requirements.
| Cost driver | Why it moves the number |
|---|---|
| Container and label format count | Every format adds change parts, and changeover design costs more than the format count suggests |
| Label positions per container | Front only is one applicator. Front, back and wrap with registration is three problems |
| Line rate at the print position | Sets the coder class, the web dispense speed and whether the container has to be slowed or held |
| Substrate and surface condition | Curved, glossy, wet, cold or low-energy surfaces change the adhesive, the coder and the lighting together |
| Code content | A shared batch and date code is a print field. A unique 2D code is a subsystem with a serial source, reconciliation and reject |
| Verification depth | Decode only, decode plus grade, or grade plus OCV against the expected string |
| Reject and reconciliation | Confirmed ejection, locked bin, level sensing and batch reconciliation are engineering |
| Environment | Washdown, cleanroom classification, solvent vapour zones and hazardous area classification each change the build |
| Controls integration | Dry contacts to an existing PLC versus recipe download from MES, and whether the existing controller can be extended at all |
| Validation scope | IQ, OQ and PQ with protocol authoring is a documentation project running alongside the build |
Lead time runs 16 to 24 weeks from concept approval to factory acceptance testing on a standard build, and 24 to 32 weeks where cleanroom compatibility or full GMP validation applies. Design, fabrication, assembly and testing all happen at our Woodlands Link facility, which is why a Singapore buyer attends the factory acceptance test without flying to it. Motionwell has been building special purpose machines since 2014, with more than 150 delivered, and holds ISO 9001:2015 and bizSAFE Level 3.
Frequently Asked Questions
Which labelling method suits a round bottle, a flat pack and a small vial?
A round bottle is usually spun against a backing belt for a self-adhesive wrap label, or run through a roll-fed labeller with glue when one format runs at volume all year. A flat pack takes a top or side wipe-on applicator, or a tamp head where the surface is recessed. A small vial is a handling problem before it is a labelling problem: it needs pucks or a starwheel to hold it square, because a vial that rotates freely under the applicator will always land the label crooked.
Do you still need a camera after the coder, or is the printer enough?
You need the camera. A printer reports that it sent a print command; it has no way of reporting that a readable code landed on the pack. Blocked nozzles, an empty cartridge, a code printed onto a carton fold and a smear from a wet surface all produce a pack the printer counts as good. The station should therefore be specified with a reader after the printhead that decodes, grades and compares every code against what the line was told to print, and rejects at that station any pack that fails.
How accurate is label placement, and what actually limits it?
The applicator is rarely the limit. Placement accuracy is set by how well the container is held and located when the label arrives. Container diameter tolerance, skew on the conveyor, label pitch on the web and speed changes all show up as placement error before the applicator contributes anything. The fixes are mechanical and optical: hold the container positively in a puck or starwheel, drive the label web from an encoder, and register from a real feature on the container using vision.